
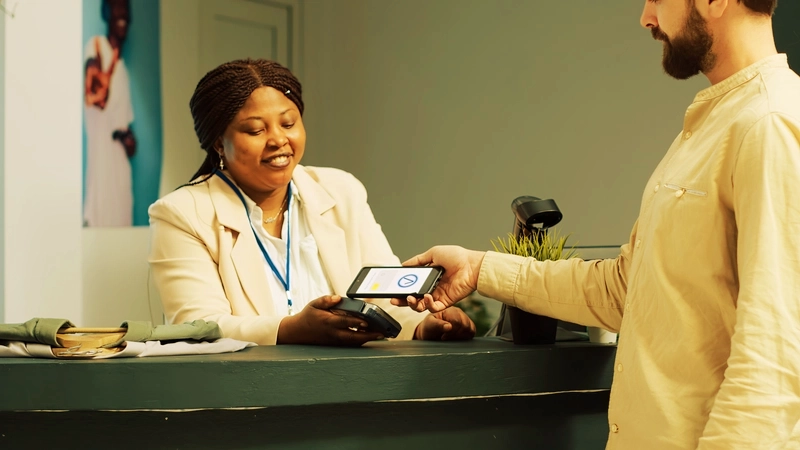
A point-of-sale (POS) system combines software and hardware that allows businesses to conduct transactions and simplify critical day-to-day business operations. Unlike traditional POS systems, mobile POS systems are more than just transactional devices; they provide comprehensive analytics, reporting, and enhanced employee management features.
What Is Android?
Android is the world’s most widely used mobile operating system, with billions of devices running on it, including Android tablets and smartphones. It has a large community of developers creating apps for it, and users can download these apps from the Google Play Store. Android is also used in other devices, such as televisions, cars, and wearables.
What Is a Mobile POS System?
A mobile POS (Point Of Sale) system is equipped with features that allow a business to process payments, manage inventory, track customer data, and more, all from a mobile device. This mobility will enable companies to take payments and manage transactions from anywhere, whether at a retail store, a food truck, or a customer’s home.
Key features of a mobile POS system
All mobile POS systems are different. That said, some features are crucial to app functionality:
- Payment processing
- Inventory management
- Sales reporting and analytics
- Customer management
- Employee management
- Mobile accessibility
- Integration with other software
- Receipt printing
- Barcode scanning
- Offline mode
- Security
- Support and updates
The importance of mobile POS systems for businesses
Mobile POS systems leverage existing mobile devices like smartphones and tablets, making them a flexible and cost-effective solution. They also come with features that help streamline operations and make informed decisions, leading to increased efficiency, better customer service, and, ultimately, higher profits.
By not leveraging everything mobile POS systems have to offer, businesses may miss out on opportunities to increase sales, improve customer satisfaction, and optimize their operations.
Step-By-Step Guide on Developing a Mobile POS Application
Developing an Android POS system involves intricate steps, from setup to deployment, each requiring attention to detail. Below is the step-by-step process for creating a robust Mobile POS application that can meet the demands of modern retail.
Step 1: Setting up the development environment
- Install Java Development Kit (JDK): Java is one of the most popular programming languages for Android development. Download and install the latest version of the JDK from the official Oracle website.
- Install Android Studio: Android Studio is the official Android development IDE (Integrated Development Environment). It includes all the tools and plugins necessary for developing Android applications. Download and install the latest version of Android Studio from the official Android developer website.
- Install Android SDK (Software Development Kit): The Android SDK includes the Android platform and other tools for developing Android applications. You can install the Android SDK through the Android Studio during installation.
- Set up a virtual device: A virtual device is an emulator to test your application without a physical device. You can set up a virtual device through the Android Virtual Device (AVD) Manager in Android Studio.
- Install necessary libraries and plugins: Depending on the features of your mobile POS application, you may need to install additional libraries and plugins. For example, you may need to install a library for processing payments or a plugin to integrate with other software like accounting.
Step 2: Designing the user interface
A user-friendly interface ensures that the application is easy to use and understand. It is crucial to Android POS software, as employees will use it to process transactions quickly and accurately. A well-designed interface can also help reduce errors, improve efficiency, and enhance the user experience.
Here are some key elements to consider when designing a mobile point-of-sale interface:
- Simple and intuitive design: The design should be simple and intuitive, with a clear layout and easy-to-understand icons and labels.
- Responsive design: The interface should be responsive, meaning it should work well on devices of all sizes, from smartphones to tablets.
- Easy navigation: Users should be able to navigate through the application quickly with a well-organized menu and clear call-to-action buttons.
- Quick and easy payment processing: The payment processing screen should be straightforward, with options for different payment methods and clear prompts for the user.
- Inventory management: The screen should provide a clear and organized view of the available stock, with options to add, edit, or remove items.
- Sales reporting: The sales reporting screen should provide a comprehensive picture of the sales data, with options to filter and analyze the data.
- Customer management: The screen should provide a clear and organized view of the customer data, with options to add, edit, or remove customers.
- Employee management: The employee management screen should provide a clear and organized view of the employee data, with options to add, edit, or remove employees.
- Settings: The settings screen should give options to customize the application according to the business needs, such as configuring the payment gateway, setting up the tax rates, etc.
- Help and support: The service and support screen should provide access to user guides, FAQs, and contact information for customer support.
Step 3: Coding the application
Coding the mobile POS application involves several steps to ensure that all the essential features are integrated and functioning correctly. Here are the steps involved in coding the mobile POS application:
- Setting up the database: You can use SQLite, a lightweight database suitable for mobile applications, or any other database that fits your requirements.
- Integrating payment gateways: Sign up for a merchant account with the payment gateway providers and follow their documentation to integrate their SDK or API into your application.
- Adding inventory management features: Adding, editing, and removing items from the inventory, tracking stock levels, and generating purchase orders.
- Adding sales tracking features: Recording sales transactions, generating sales reports, and analyzing sales data.
- Adding customer management features: Adding, editing, and removing customers, tracking purchase history, and managing customer loyalty programs.
- Adding employee management features: Adding, editing, terminating employees, tracking employee hours, and calculating commissions.
- Adding settings features: Configuring the payment gateway, setting up the tax rates, and customizing the application according to the business needs.
- Adding help and support features: Adding user guides, FAQs, and contact information for customer support.
Step 4: Testing the application
Testing is vital for mobile POS applications since they involve financial transactions and sensitive data. Testing ensures that all the features work as intended and that no bugs or errors could affect the user experience or the application’s security.
Below are various tests to perform when creating a mobile POS application:
- Unit testing: Testing individual units or components of the application to ensure they function correctly.
- Integration testing: Testing the integration between different units or elements of the application to ensure they work together perfectly.
- Functional testing: Testing the application’s functionality to ensure all the features work as intended.
- Usability testing: Testing the application’s user interface and user experience to ensure that it is user-friendly and intuitive.
- Performance testing: Testing the application’s performance to ensure that it runs smoothly on all devices and screen sizes.
- Security testing: Testing the application’s security to ensure that there are no vulnerabilities that malicious users could exploit.
- Compatibility testing: Testing the application on different devices, operating systems, and screen sizes to ensure it is compatible with all devices.
- Regression testing: Re-testing the application after changes have been made to ensure that the new changes have not introduced any new bugs or errors.
Step 5: Deploying the application
There are several steps to make certain that the Android POS application is ready for publication on the Google Play Store and meets all the required quality and performance standards.
- Sign the application: To make sure the application is safe and available for verification by the Google Play Store, sign it with your private key.
- Generate the APK file: Generate the APK (Android Package) file for the application. This is the file that will be uploaded to the Google Play Store.
- Configure the application settings: Configure the application settings for the Google Play Store. This includes setting the application’s name, description, category, and metadata.
- Prepare the store listing: Prepare the store listing for the application on the Google Play Store. This includes creating a description for the application, adding screenshots and videos, and setting the price.
- Upload the APK file: Upload the APK file to the Google Play Store.
- Submit the application for review: Apply for review on the Google Play Store. The Google Play Store team will review the application to ensure it meets all required quality and performance standards for Android devices.
- Monitor the review process: Monitor the review process on the Google Play Store. You will receive notifications about the status of your application and any issues that need to be addressed.
- Address any issues: Address any issues that are identified during the review process. This may involve making changes to the application to fit an Android device and resubmitting it for review.
- Publish the application: Once the Google Play Store team has approved the application, you can publish the application on the Google Play Store. The application will then be available for download.
- Monitor the application: Monitor the application on the Google Play Store to ensure no issues are affecting users and to respond to user feedback and reviews.
We Can Help You Create a Custom Android POS System!
Developing an Android POS app is essential for businesses, such as merchant services provider, aiming to streamline operations, enhance customer service, and, ultimately, drive higher profits.
The process, though intricate, is a worthwhile investment of time and resources. However, it’s understandable if your company lacks in-house time and resources. Most companies do.
At WillDom, our expertise in mobile app development and a team of highly skilled developers empower us to craft bespoke mobile POS software tailored precisely to your business needs. We manage the entire development process, from design to deployment, guaranteeing a seamless and hassle-free experience.
Contact WillDom today and embark on the journey towards a more efficient and profitable future!